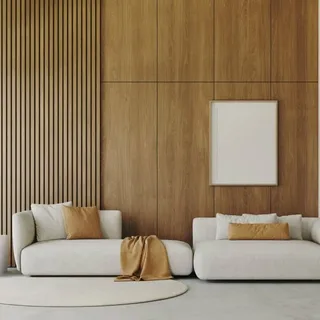
Wall panels are an excellent way to enhance the look of any room, offering both style and functionality. Whether you’re aiming for a rustic wood finish, sleek modern design, or textured elegance, installing wall panels yourself can save money and give you a rewarding DIY experience. This article will guide you through DIY Wall Panel Installation: Tips and Tricks for Beginners to help you achieve professional-looking results without the hassle.
Why Choose DIY Wall Panel Installation?
Taking on a DIY wall panel installation project allows you to customize your space while honing your handyman skills. Wall panels are relatively easy to install compared to other home renovations, making them a perfect beginner-friendly project. Plus, you get the satisfaction of seeing your hard work transform your room.
Essential Tools and Materials for Beginners
Before diving into your DIY wall panel installation, gather the following tools and materials:
- Wall panels (wood, MDF, PVC, or decorative)
- Measuring tape
- Level
- Stud finder
- Adhesive or nails
- Saw (hand saw or power saw)
- Sandpaper
- Paint or stain (optional)
Having these on hand will make your installation process smooth and efficient.
Step-by-Step Guide for DIY Wall Panel Installation
1. Prepare Your Walls
Start by cleaning the wall surface where you’ll install the panels. Remove any nails, hooks, or debris. Use a stud finder to locate the studs behind the wall—this is crucial for securing the panels properly.
2. Measure and Cut Panels Accurately
Measure your wall carefully and mark the panels for cutting. Precision is key; uneven cuts can lead to gaps or misalignment. Use a saw to cut panels to fit your wall dimensions.
3. Start Installing from the Bottom
Begin at the bottom of the wall and work your way up. Attach the first panel securely, ensuring it’s level. Use adhesive or nails depending on your panel type and wall surface.
4. Leave Space for Expansion
If you’re installing wood or natural materials, leave a small gap between the panels and floor or ceiling to allow for natural expansion and contraction.
5. Finish with Paint or Stain
Once all panels are installed, you can paint or stain them to match your room’s decor. This step adds a polished look and protects your panels from wear.
Common Mistakes to Avoid
- Skipping the use of a level, which leads to crooked panels.
- Not finding and securing panels to studs.
- Cutting panels without precise measurements.
- Ignoring expansion gaps for wood panels.
By keeping these points in mind, your DIY wall panel installation will be more successful and look professionally done.
Final Thoughts
Embarking on a DIY wall panel installation project is both exciting and manageable, even for beginners. With the right preparation, tools, and techniques, you can dramatically transform your living space. Remember to take your time, measure carefully, and enjoy the process of making your home uniquely yours.


